Uncategorized

DIY Board and Batten Stairwell

After I saw how easy it was to do this to my entry, I couldn’t wait any longer to get started on my stairwell. I wanted to make sure that I figured it out correctly so I downloaded an app on my IPad Pro called Morpholio Trace.

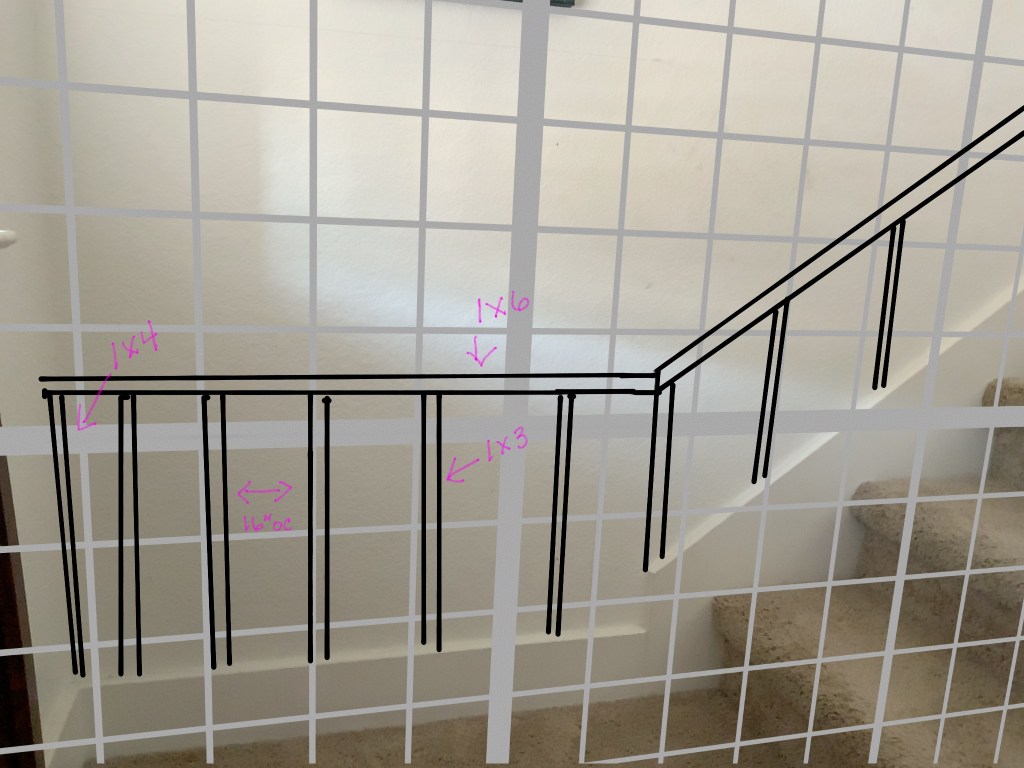
This app allowed me to take a picture of my wall or a room and would give me grid lines so that I could try to correctly sketch out how my battens would look. I have seen on Pinterest so many different ideas for board and batten. I have seen it go to the ceiling….with large grid patterns.. and so many other patterns that I knew that I needed to keep it simple. My whole reason for doing this to my walls was to add detail and add paint without having to paint up to the 20′ ceiling. After taking the pictures of my stairwell and seeing how it would look I made my plan.

I used the 1/8″ hard board as the background, just as I did for the entry wall. This allowed me to have a smooth surface to paint on.

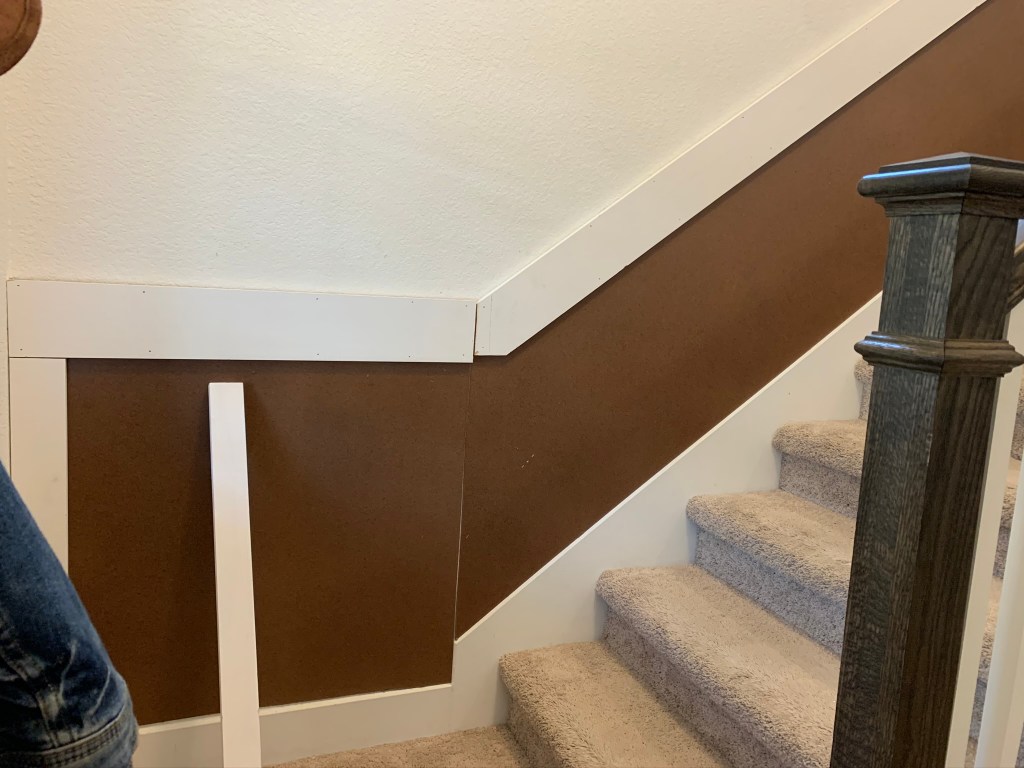
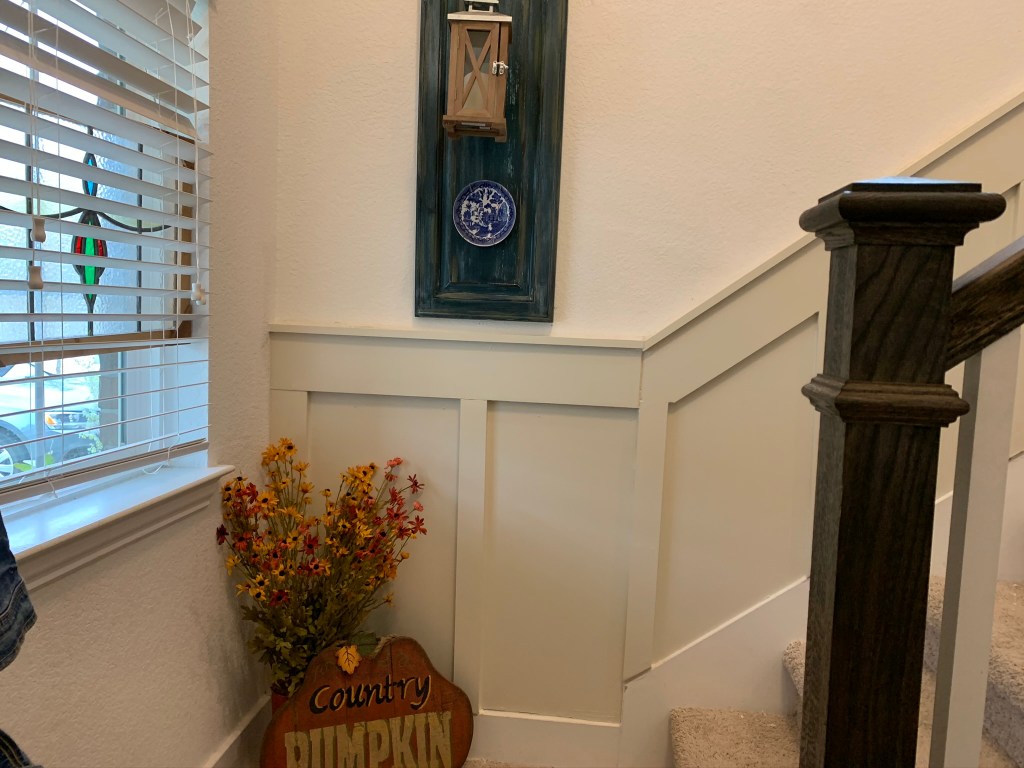
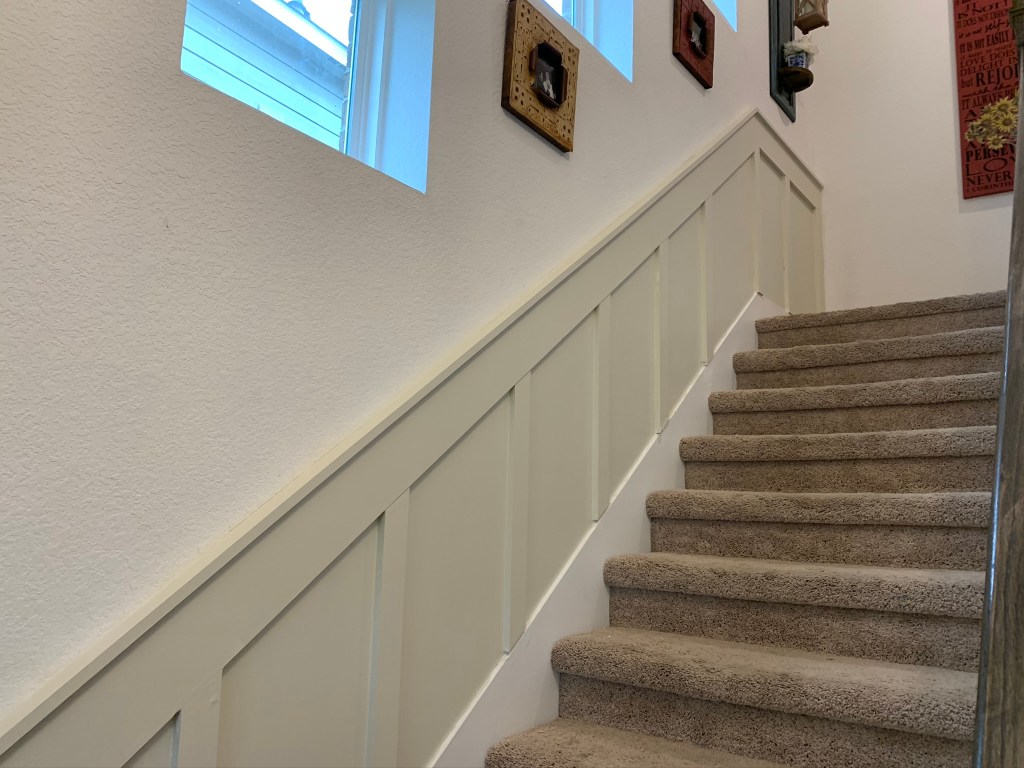
The bottom landing board was roughly 3′ x 3′ and the other boards going up the stairs and on the middle landing are 2′ w. As you can see from the picture the bottom baseboard was lower than the stair boards so the extra height allowed them to match up.

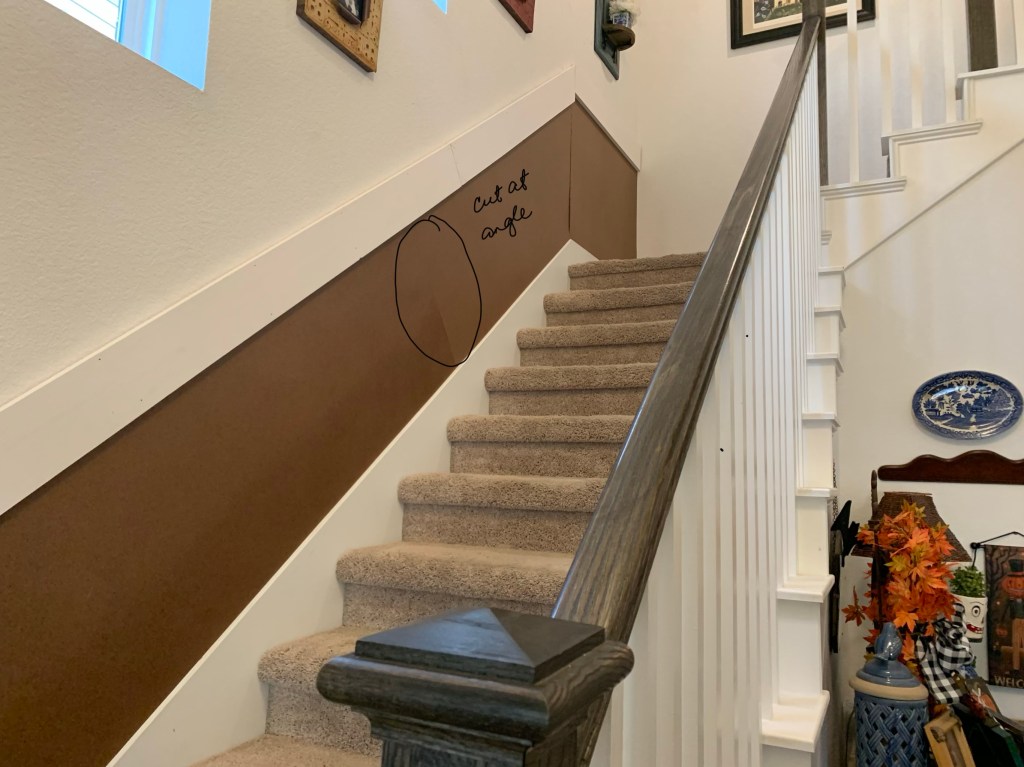
Ehem…now going up the stairs. If I were to recommend that you do anything differently it would be that you mark out were your batten spacing would be so that when you attach the last hard board going up the stairs you could then cut that at the place and in the angle of the batten that would cover it. I didn’t do that on mine and while you don’t really see it anymore it would have saved me a lot of time in floating joint compound so that it would be covered up.

Now I know!

I attached the hardboard with liquid nails and added 1 x 6 as my top horizontal board. I then attached 1×4 boards as my end vertical boards (Just as I did on my entry wall). I then cut 1×3 boards for my battens and spaced at 16″ OC. Which is the center of one board to the center of the next board.

Once all of the boards where attached with a nail gun I used painters caulk and primed the walls. I once again painted with Behr “Alpaka Blanket”!

It adds so much character to that big white wall.

If you get a chance check out my YouTube channel and please subscribe while you’re there. I have posted a quick video on this and many other things I’ve been working on.

Thanks so much reading and have a great day!

Lots of Love,

XO Valerie

DIY Board and Batten Stairwell

Advertisement
Recipes

Our Halloween Meal Tradition with a Keto Twist

My cute dinner guests!

So for the longest time I have been making a special Halloween meal for my kids and family. It has normally consisted of spaghetti and eyeballs (aka meatballs) with breadsticks that look like witches fingers. This year since I am trying to be low carb / keto I thought I would try to make a few substitutions and see if my guys will like it.

I used a recipe I found for meatballs and substituted the breadcrumbs for pork rinds and added a black olive to the middle to look like an eyeball. If you look up the recipe you will see that i made a few other substitutions as well. I added parmesan as the cheese instead of romano and left out the garlic. (my grandson thinks its spicy) /https://www.allrecipes.com/recipe/40399/the-best-meatballs/

eyeball meatballs

After splitting the spaghetti squash, I removed the seeds and brushed with olive oil and seasoned with salt and pepper. I then baked at 400 until browned and softened. When ready remove from oven and peel away the squash from the peel with a fork.

Witches fingers

The recipe for this is a basic fat head dough

2 cups of shredded mozzarella cheese

2 T cream cheese

Italian seasoning

shreaded parmesan cheese

pesto

1 egg

3/4 cup of almond flour

handful of sliced almonds – for fingernails

combine mozzarella and cream cheese and microwave for 1 minute. mix and microwave for 30 more minutes. add egg, almond flour, italian seasoning and pesto. Form long finger shape on silicone baking sheet, ceramic dish or parchment paper on a cookie sheet. add parmesan cheese, more pesto and almond slivers for nails and bake until golden brown.

They spread a little 🙂

They were so much better than the breadsticks I used to make. I have to say that this dinner was a huge success!

Thanks for checking this recipe out and I hope you have an awesome Halloween!

XO Valerie

About Me

Hello World It’s Me Valerie

So where to begin? I am going to be 50 in February…yikes! I think if you asked my 16 yr old self what I wanted to do with my life, I would have said I wanted to be a buyer for a department store or own my own shop, but I always knew that I wanted to do something creative with my life. I figured that i would have a husband and kids but that was something that would happen later. Well (clear my throat) add 4 years, 2 children and a divorce and I was well into the first part of my life and It wasn’t exactly go the way that I always envisioned. I have no complaints though. During that time I learned what I was capable of, what I could do on my own, how creative I actually could be and not to mention frugal. I learned how to get what I wanted on a small budget. These days because of all of that I am the person that my family calls if they want something fixed, built or installed. I told myself that when I am financially able to I am going to buy brand new furniture, but you know what I realized? When I was able to I didn’t like it as much as the headboard I built from a door or the dresser I painted. Now here I am 50 and while I may be able to buy new, I prefer the thrifted and painted furniture and the self made artwork for my home or the reclaimed items that I have made new again.

This reclaimed life is not just about tangible things but about doing more things and meeting more people. Not just talking about it but being about it. I am going to start a business! I am going to write a blog! I am going to have a YouTube channel! I am going to get more involved, whether its in my church or my community! I am going to go on adventures like take an RV on the longest yard sale, be part of the Junk Gypsy’s Junk-O-Rama Prom at Round Top, TX’s Antique Week Festival. I am going to live the life I have always imagined and document the whole dang thing!

I hope that you will follow me and come along for this next adventure.

XO Valerie